This post was originally published on Toptal under my Toptal account.
If you’re an Android developer, chances are you’ve heard of RxJava. It’s one of the most discussed libraries for enabling Reactive Programming in Android development. It’s touted as the go-to framework for simplifying concurrency/asynchronous tasks inherent in mobile programming.
But… what is RxJava and how does it “simplify” things?
While there are lots of resources already available online explaining what RxJava is, in this article my goal is to give you a basic introduction to RxJava and specifically how it fits into Android development. I’ll also give some concrete examples and suggestions on how you can integrate it in a new or existing project.
Why Consider RxJava
At its core, RxJava simplifies development because it raises the level of abstraction around threading. That is, as a developer you don’t have to worry too much about the details of how to perform operations that should occur on different threads. This is particularly attractive since threading is challenging to get right and, if not correctly implemented, can cause some of the most difficult bugs to debug and fix.
Granted, this doesn’t mean RxJava is bulletproof when it comes to threading and it is still important to understand what’s happening behind the scenes; however, RxJava can definitely make your life easier.
Let’s look at an example.
Network Call – RxJava vs AsyncTask
Say we want to obtain data over the network and update the UI as a result. One way to do this is to (1) create an inner AsyncTask subclass in our Activity/Fragment, (2) perform the network operation in the background, and (3) take the result of that operation and update the UI in the main thread.
1 2 3 4 5 6 7 8 9 10 11 12 13 14 15 16 17 18 19 20 21 | |
Harmless as this may seem, this approach has some issues and limitations. Namely, memory/context leaks are easily created since NetworkRequestTask is an inner class and thus holds an implicit reference to the outer class. Also, what if we want to chain another long operation after the network call? We’d have to nest two AsyncTasks which can significantly reduce readability.
In contrast, an RxJava approach to performing a network call might look something like this:
1 2 3 4 5 6 7 8 9 10 11 12 13 14 15 16 17 18 19 20 | |
Using this approach, we solve the problem (of potential memory leaks caused by a running thread holding a reference to the outer context) by keeping a reference to the returned Subscription object. This Subscription object is then tied to the Activity/Fragment object’s #onDestroy() method to guarantee that the Action1#call operation does not execute when the Activity/Fragment needs to be destroyed.
Also, notice that that the return type of #getObservableUser(...) (i.e. an Observable<User>) is chained with further calls to it. Through this fluid API, we’re able to solve the second issue of using an AsyncTask which is that it allows further network call/long operation chaining. Pretty neat, huh?
Let’s dive deeper into some RxJava concepts.
Observable, Observer, and Operator – The 3 O’s of RxJava Core
In the RxJava world, everything can be modeled as streams. A stream emits item(s) over time, and each emission can be consumed/observed.
If you think about it, a stream is not a new concept: click events can be a stream, location updates can be a stream, push notifications can be a stream, and so on.

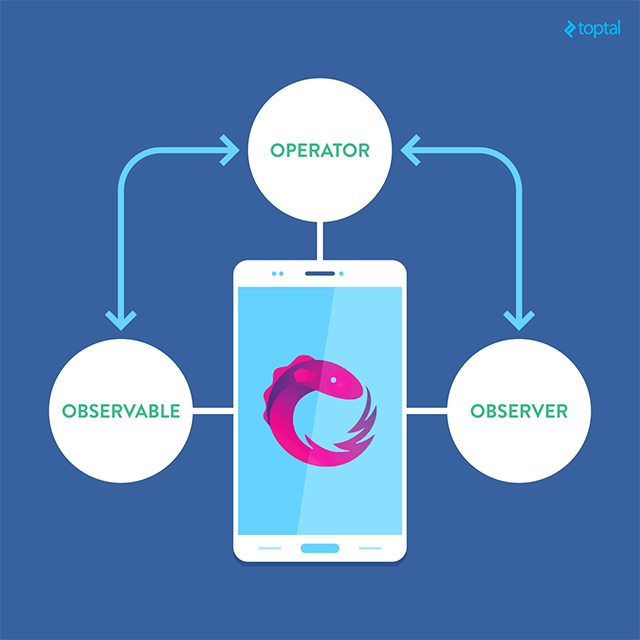
The stream abstraction is implemented through 3 core constructs which I like to call “the 3 O’s”; namely: the Observable, Observer, and the Operator. The Observable emits items (the stream); and the Observer consumes those items. Emissions from Observable objects can further be modified, transformed, and manipulated by chaining Operator calls.
Observable
An Observable is the stream abstraction in RxJava. It is similar to an Iterator in that, given a sequence, it iterates through and produces those items in an orderly fashion. A consumer can then consume those items through the same interface, regardless of the underlying sequence.
Say we wanted to emit the numbers 1, 2, 3, in that order. To do so, we can use the Observable<T>#create(OnSubscribe<T>) method.
1 2 3 4 5 6 7 8 | |
Invoking subscriber.onNext(Integer) emits an item in the stream and, when the stream is finished emitting, subscriber.onCompleted() is then invoked.
This approach to creating an Observable is fairly verbose. For this reason, there are convenience methods for creating Observable instances which should be preferred in almost all cases.
The simplest way to create an Observable is using Observable#just(...). As the method name suggests, it just emits the item(s) that you pass into it as method arguments.
1
| |
Observer
The next component to the Observable stream is the Observer (or Observers) subscribed to it. Observers are notified whenever something “interesting” happens in the stream. Observers are notified via the following events:
Observer#onNext(T)– invoked when an item is emitted from the streamObservable#onError(Throwable)– invoked when an error has occurred within the streamObservable#onCompleted()– invoked when the stream is finished emitting items.
To subscribe to a stream, simply call Observable
1 2 3 4 5 6 7 8 9 10 11 12 13 14 | |
The above code will emit the following in Logcat:
1 2 3 4 5 | |
There may also be some instances where we are no longer interested in the emissions of an Observable. This is particularly relevant in Android when, for example, an Activity/Fragment needs to be reclaimed in memory.
To stop observing items, we simply need to call Subscription#unsubscribe() on the returned Subscription object.
1 2 3 4 5 6 7 8 9 10 11 12 13 14 15 16 | |
As seen in the code snippet above, upon subscribing to an Observable, we hold the reference to the returned Subscription object and later invoke subscription#unsubscribe() when necessary. In Android, this is best invoked within Activity#onDestroy() or Fragment#onDestroy().
Operator
Items emitted by an Observable can be transformed, modified, and filtered through Operators before notifying the subscribed Observer object(s). Some of the most common operations found in functional programming (such as map, filter, reduce, etc.) can also be applied to an Observable stream. Let’s look at map as an example:
1 2 3 4 5 6 7 8 9 10 11 12 13 14 15 16 17 | |
The code snippet above would take each emission from the Observable and multiply each by 2, producing the stream 2, 4, 6, 8, 10, respectively. Applying an Operator typically returns another Observable as a result, which is convenient as this allows us to chain multiple operations to obtain a desired result.
Given the stream above, say we wanted to only receive even numbers. This can be achieved by chaining a filter operation.
1 2 3 4 5 6 7 8 9 10 11 12 13 14 15 16 17 18 19 20 21 | |
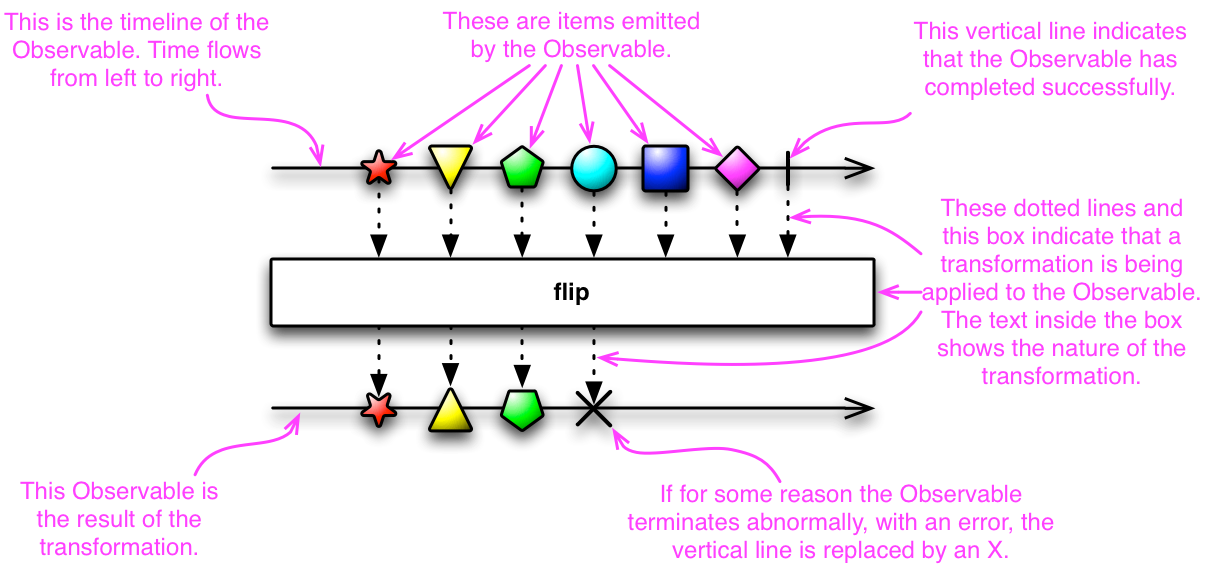
There are many operators built-in the RxJava toolset that modify the Observable stream; if you can think of a way to modify the stream, chances are, there’s an Operator for it. Unlike most technical documentation, reading the RxJava/ReactiveX docs is fairly simple and to-the-point. Each operator in the documentation comes along with a visualization on how the Operator affects the stream. These visualizations are called “marble diagrams.”
Here’s how a hypothetical Operator called flip might be modeled through a marble diagram:
Multithreading with RxJava
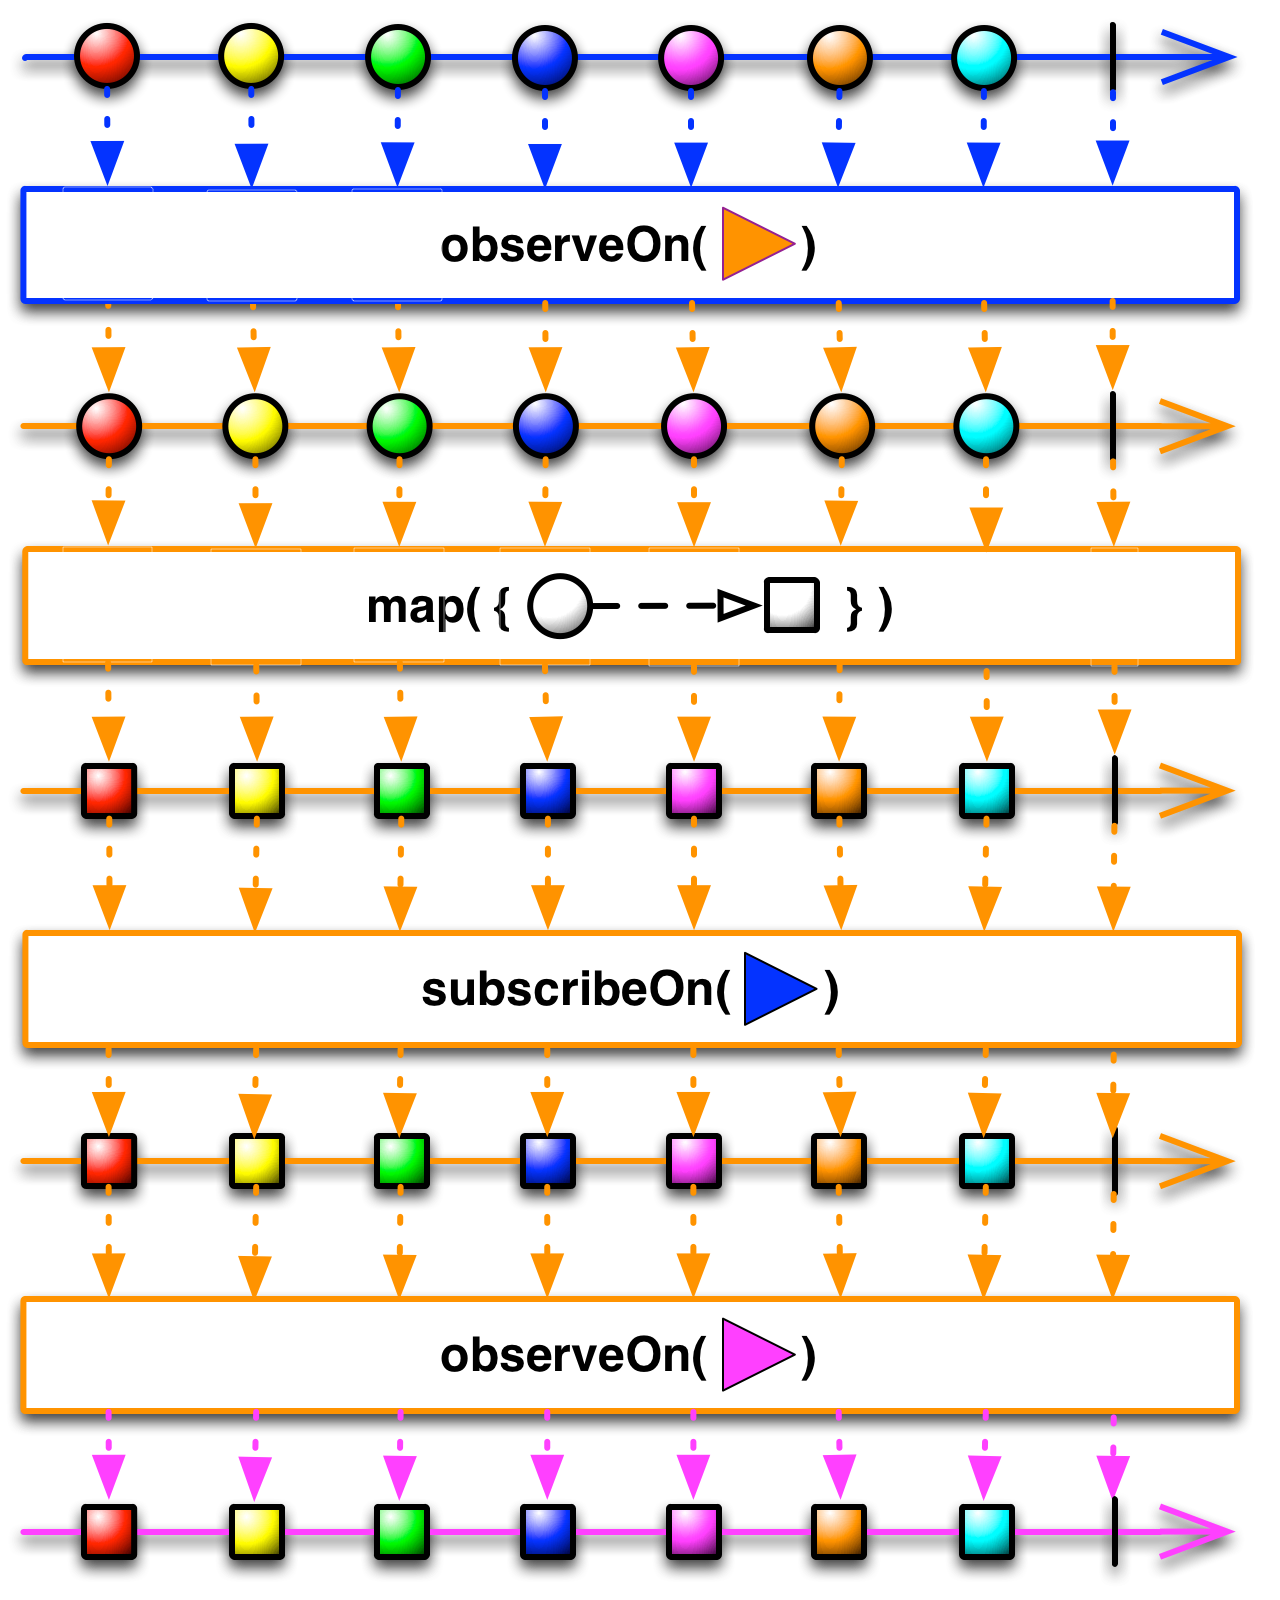
Controlling the thread within which operations occur in the Observable chain is done by specifying the Scheduler within which an operator should occur. Essentially, you can think of a Scheduler as a thread pool that, when specified, an operator will use and run on. By default, if no such Scheduler is provided, the Observable chain will operate on the same thread where Observable#subscribe(...) is called. Otherwise, a Scheduler can be specified via Observable#subscribeOn(Scheduler) and/or Observable#observeOn(Scheduler) wherein the scheduled operation will occur on a thread chosen by the Scheduler.
The key difference between the two methods is that Observable#subscribeOn(Scheduler) instructs the source Observable which Scheduler it should run on. The chain will continue to run on the thread from the Scheduler specified in Observable#subscribeOn(Scheduler) until a call to Observable#observeOn(Scheduler) is made with a different Scheduler. When such a call is made, all observers from there on out (i.e., subsequent operations down the chain) will receive notifications in a thread taken from the observeOn Scheduler.
Here’s a marble diagram that demonstrates how these methods affect where operations are run:
In the context of Android, if a UI operation needs to take place as a result of a long operation, we’d want that operation to take place on the UI thread. For this purpose, we can use AndroidScheduler#mainThread(), one of the Schedulers provided in the RxAndroid library.
RxJava on Android
Now that we’ve got some of the basics under our belt, you might be wondering — what’s the best way to integrate RxJava in an Android application? As you might imagine, there are many use cases for RxJava but, in this example, let’s take a look at one specific case: using Observable objects as part of the network stack.
In this example, we will look at Retrofit, an HTTP client open sourced by Square which has built-in bindings with RxJava to interact with GitHub’s API. Specifically, we’ll create a simple app that presents all the starred repositories for a user given a GitHub username. If you want to jump ahead, the source code is available here.
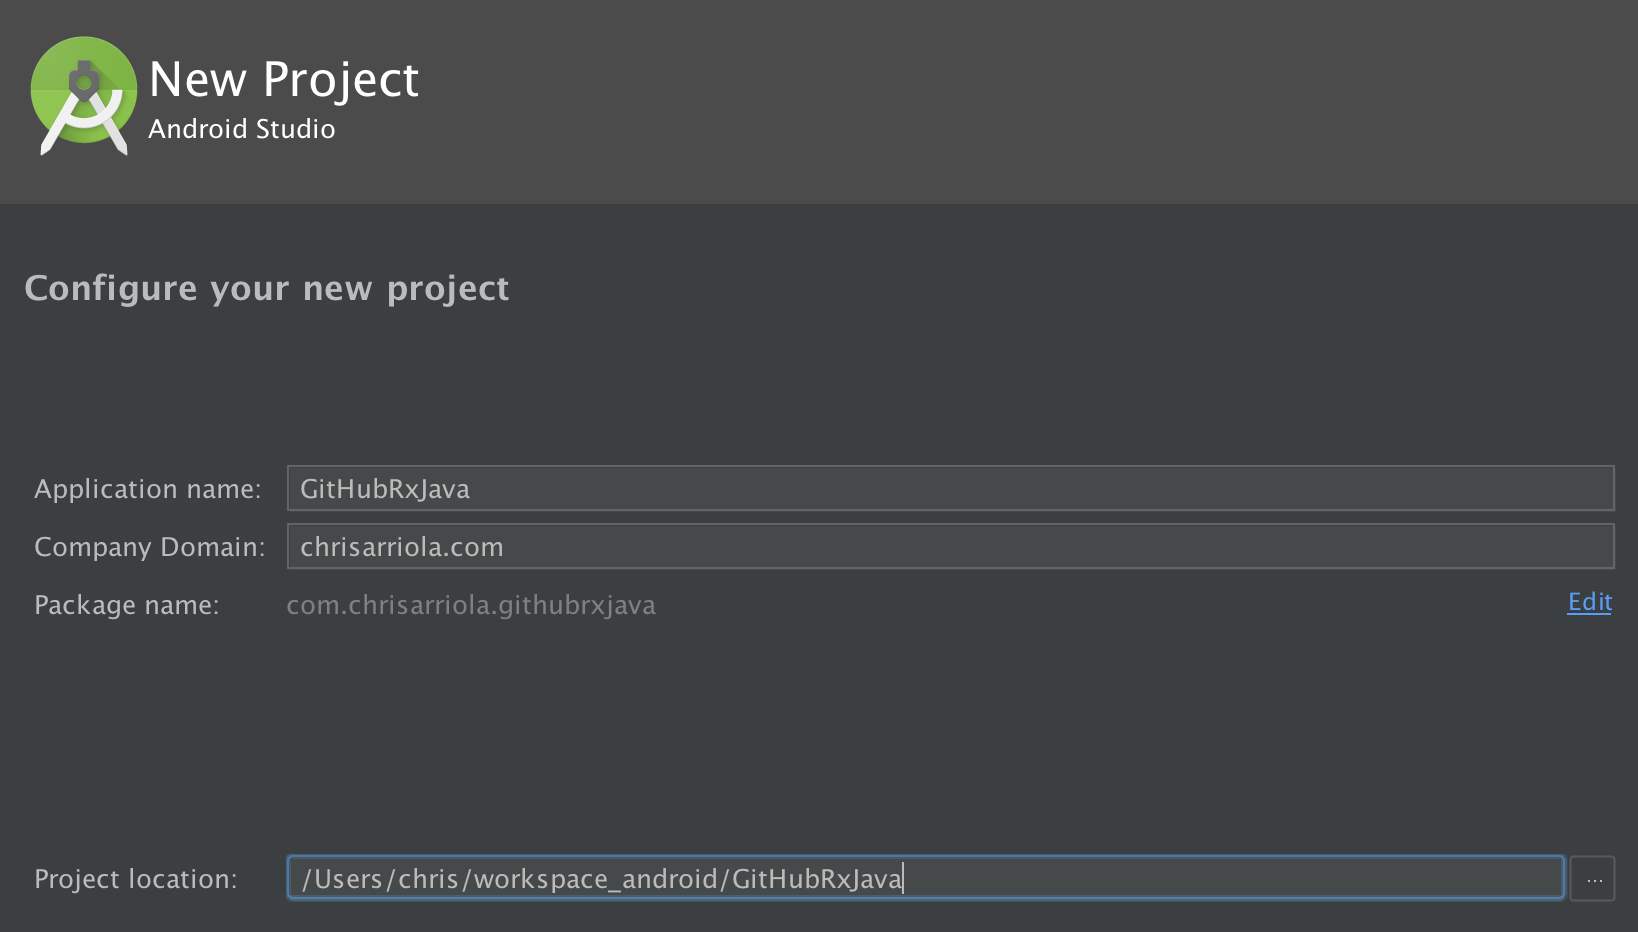
Create a New Android Project
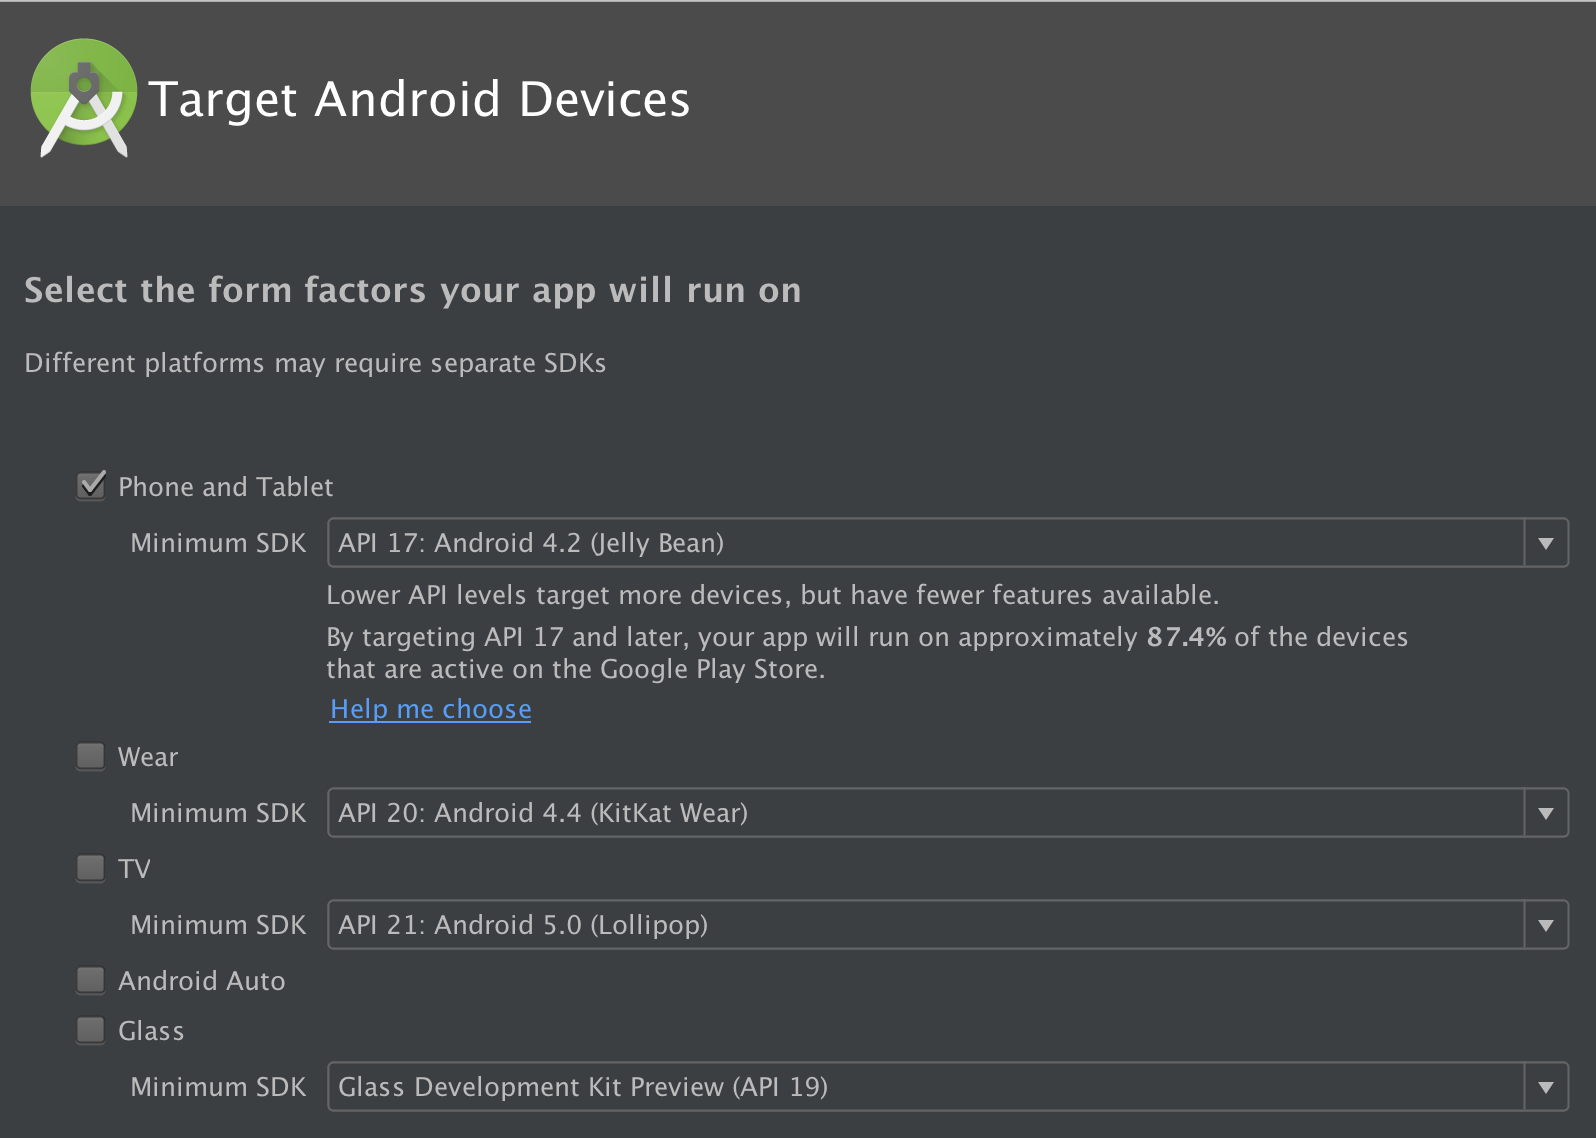
- Start by creating a new Android project and naming it GitHubRxJava.
- In the Target Android Devices screen, keep Phone and Tablet selected and set the minimum SDK level of 17. Feel free to set it to a lower/higher API level but, for this example, API level 17 will suffice.
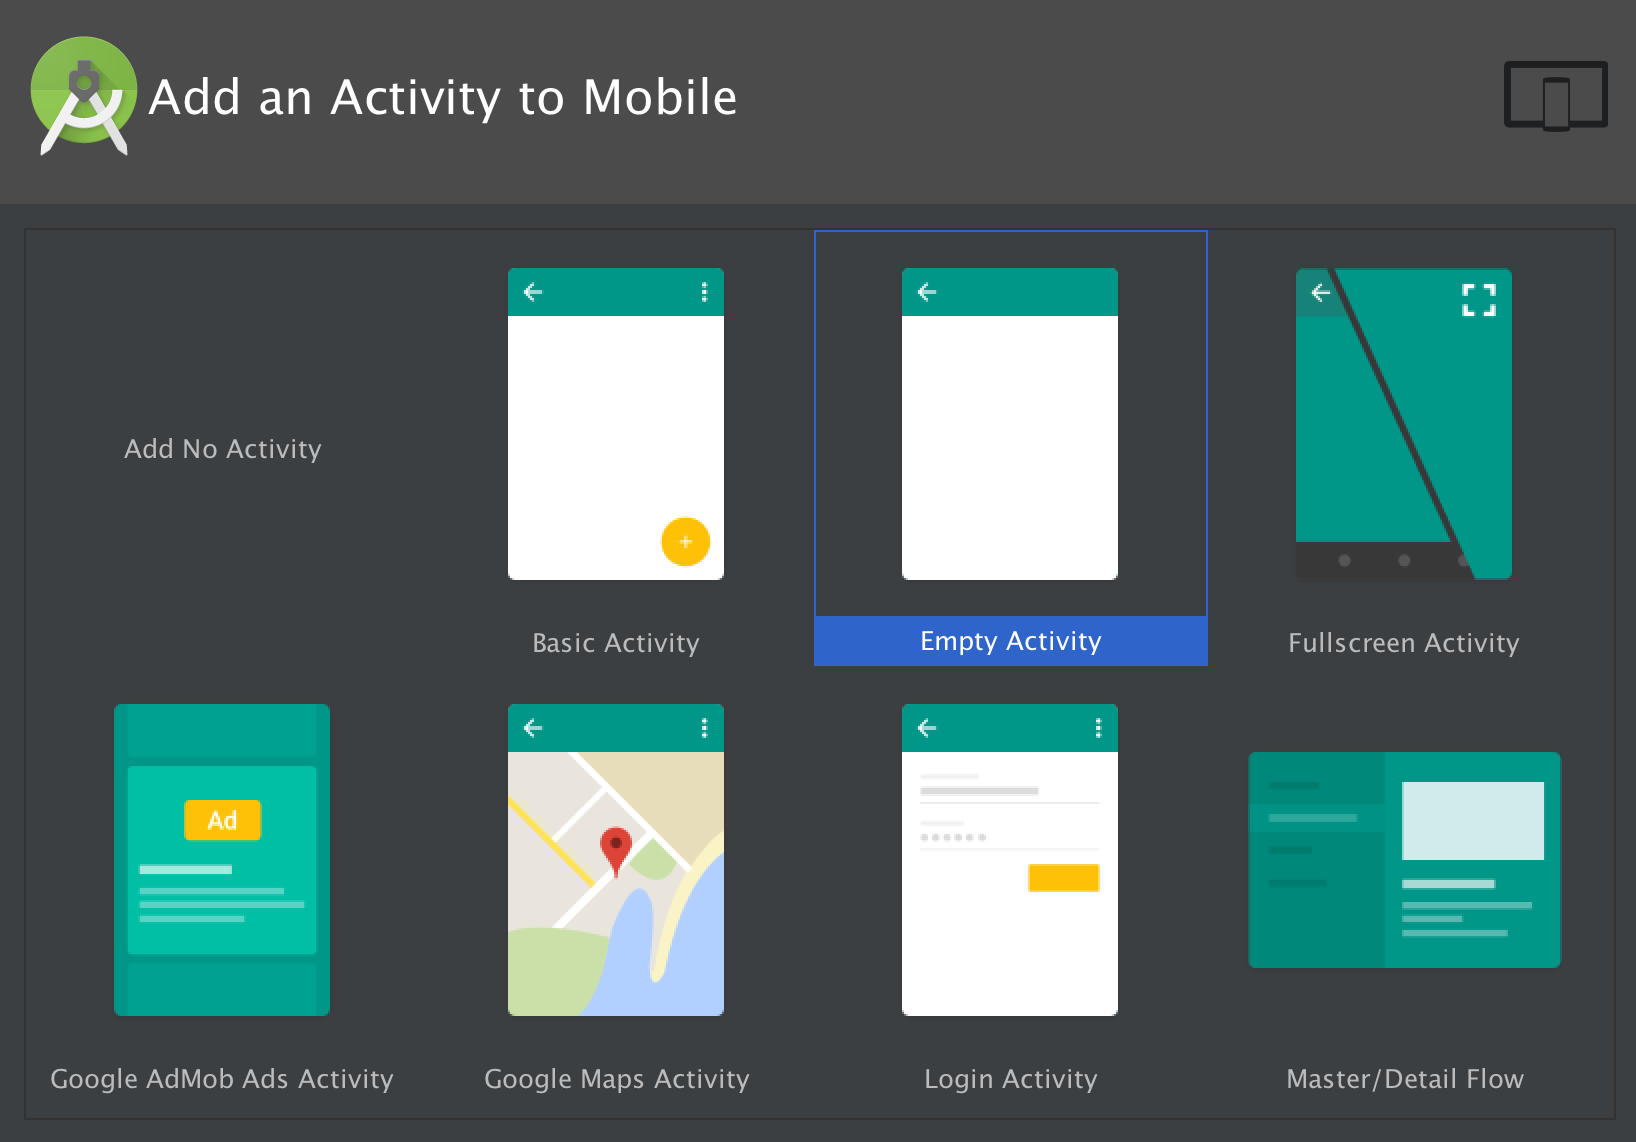
- Select Empty Activity in the next prompt.
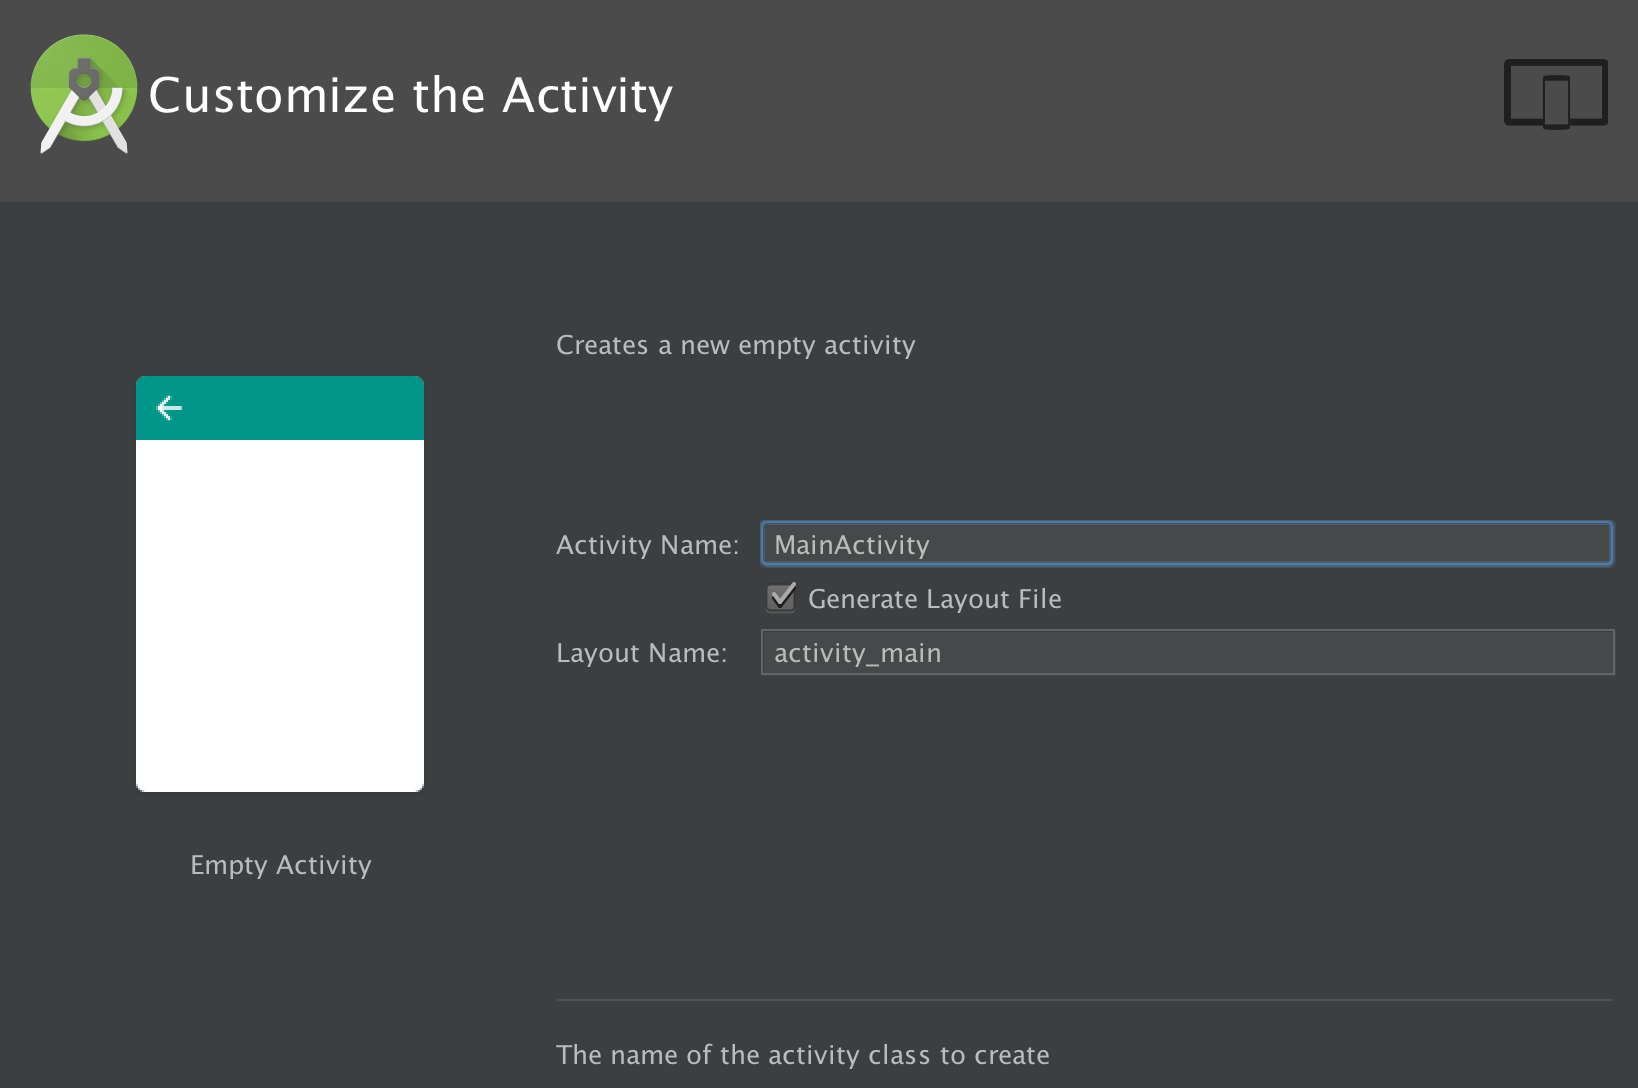
- In the last step, keep the Activity Name as MainActivity and generate a layout file activity_main.
Project Set-Up
Include RxJava, RxAndroid, and the Retrofit library in app/build.gradle. Note that including RxAndroid implicitly also includes RxJava. It is best practice, however, to always include those two libraries explicitly since RxAndroid does not always contain the most up-to-date version of RxJava. Explicitly including the latest version of RxJava guarantees use of the most up-to-date version.
1 2 3 4 5 6 7 8 | |
Create Data Object
Create the GitHubRepo data object class. This class encapsulates a repository in GitHub (the network response contains more data but we’re only interested in a subset of that).
1 2 3 4 5 6 7 8 9 10 11 12 13 14 15 16 17 18 | |
Set-Up Retrofit
- Create the
GitHubServiceinterface. We will pass this interface into Retrofit and Retrofit will create an implementation ofGitHubService.
1 2 3 | |
- Create the
GitHubClientclass. This will be the object we will interact with to make network calls from the UI level.- When constructing an implementation of
GitHubServicethrough Retrofit, we need to pass in anRxJavaCallAdapterFactoryas the call adapter so that network calls can return Observable objects (passing a call adapter is needed for any network call that returns a result other than aCall). - We also need to pass in a
GsonConverterFactoryso that we can use Gson as a way to marshal JSON objects to Java objects.
- When constructing an implementation of
1 2 3 4 5 6 7 8 9 10 11 12 13 14 15 16 17 18 19 20 21 22 23 24 25 26 27 28 | |
Set-Up Layouts
Next, create a simple UI that displays the retrieved repos given an input GitHub username. Create activity_home.xml – the layout for our activity – with something like the following:
1 2 3 4 5 6 7 8 9 10 11 12 13 14 15 16 17 18 19 20 21 22 23 24 25 26 27 28 29 30 31 32 33 34 | |
Create item_github_repo.xml – the ListView item layout for GitHub repository object – with something like the following:
1 2 3 4 5 6 7 8 9 10 11 12 13 14 15 16 17 18 19 20 21 22 23 24 25 26 27 28 29 30 31 32 33 34 35 36 37 38 39 40 41 42 43 44 45 46 47 48 49 50 | |
Glue Everything Together
Create a ListAdapter that is in charge of binding GitHubRepo objects into ListView items. The process essentially involves inflating item_github_repo.xml into a View if no recycled View is provided; otherwise, a recycled View is reused to prevent overinflating too many View objects.
1 2 3 4 5 6 7 8 9 10 11 12 13 14 15 16 17 18 19 20 21 22 23 24 25 26 27 28 29 30 31 32 33 34 35 36 37 38 39 40 41 42 43 44 45 46 47 48 49 50 51 52 53 54 55 56 57 58 59 60 61 62 63 64 65 66 | |
Glue everything together in MainActivity. This is essentially the Activity that gets displayed when we first launch the app. In here, we ask the user to enter their GitHub username, and finally, display all the starred repositories by that username.
1 2 3 4 5 6 7 8 9 10 11 12 13 14 15 16 17 18 19 20 21 22 23 24 25 26 27 28 29 30 31 32 33 34 35 36 37 38 39 40 41 42 43 44 45 46 47 48 49 50 51 52 53 54 | |
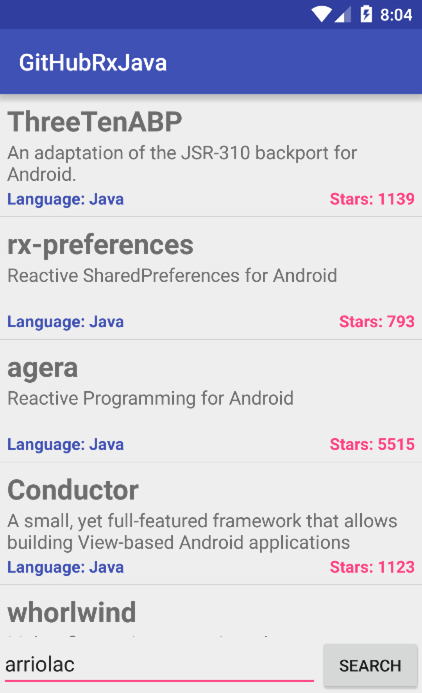
Run the App
Running the app should present a screen with an input box to enter a GitHub username. Searching should then present the list of all starred repos.
Conclusion
I hope this serves as a useful introduction to RxJava and an overview of its basic capabilities. There are a ton of powerful concepts in RxJava and I urge you to explore them by digging more deeply into the well-documented RxJava wiki.
Feel free to leave any questions or comments in the comment box below. You can also follow me on Twitter at @arriolachris where I tweet a lot about RxJava and all things Android.